To initiate a controlled document, you must have the Capability to “Manage Controlled Documents”. The System Administrator can assign capabilities from the CERF application through “Sessions > Manage Capabilities” from the application menu.
A document must first be Finalized before being made a Controlled Document. If you have the capability of “Manage Controlled Documents”, select a document in the Document Tree, then right-click on document and select Edit > Finalize. Once the document is finalized, then right-click on the document and select Controlled Documents > New.
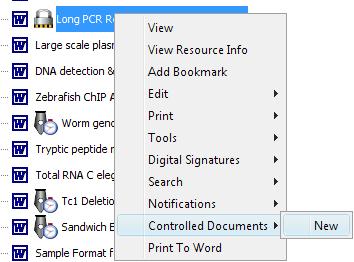
Note: Another way to initiate a Controlled Document is to drag a document (must be finalized) from the Document Tree to the Controlled Documents pane. (First open the Controlled Documents pane by clicking on the Controlled Documents icon ![]() over the middle panel of CERF.) Drop the document either in the white space at the bottom of the list of Controlled Documents or drop it on the “New” button
over the middle panel of CERF.) Drop the document either in the white space at the bottom of the list of Controlled Documents or drop it on the “New” button ![]() on the Controlled Documents toolbar.
on the Controlled Documents toolbar.
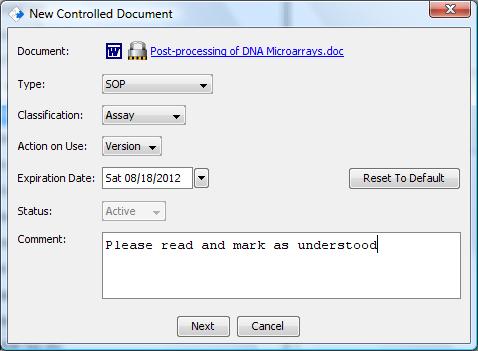
This launches the New Controlled Document dialog in which you set the Controlled Document parameters. Select the Type (in this case SOP) and Classification (here Assay is chosen) and other parameters such as expiration date. Note that “Action on Use” refers to how the Controlled Document will be treated when it is used in the Notebook. The choices are Link or Copy. Enter a comment (optional).
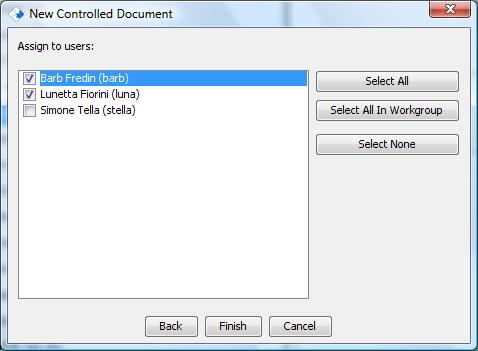
Click the Next button to assign users or whole workgroups to mark the Controlled Document as Read and Understood. Only users who have Guest access roles or higher will be shown in the user list.
Click Next to optionally add users who agree to the controlled document to an additional workgroup. This is useful to have a user first agree to terms before automatically being added to a workgroup.
Click Finish to create the Controlled Document.
Sections in this Topic
< Controlled Documents up Controlled Document Expiration >