Once a user who has been asked to approve a Controlled Document has approved it, they may use it in their Notebook. This insures that users have the approved version and are using it.
Drag and Drop method:
- Open the page of the Notebook (double-click on the page to load it in the Notebook Viewer) where you want to add the Controlled Document
- Open the Controlled Documents Pane by clicking on the Controlled Documents icon above the middle panel of CERF.
- Select the Controlled Document you want to use and check that you have approved it by clicking on the Users tab in the right pane. Another way to find Controlled Documents you have approved is to use the Filter feature (click on Show Filters and select the checkbox next to “Approved by” and select your name from the drop-down list).
- Drag the Controlled Document from the Controlled Documents pane to the Notebook icon above the middle panel (don’t drop the Controlled Document yet). This opens the Notebook Viewer to the page that is loaded.
- Now drag the Controlled Document to the open Notebook Page in the Notebook Viewer and drop it.

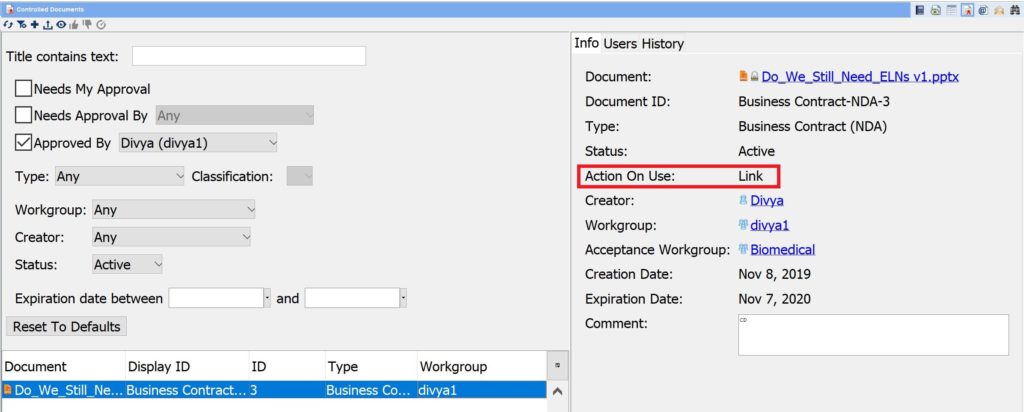
Note that the Controlled Document will be pasted to the Notebook as a Link or a Copy. This depends on what was chosen when the Controlled Document was created. You can find this information by selecting the Controlled Document in the Controlled Documents pane and viewing the info in the right info tab.
Here is an example of a Controlled Document that has been filtered to show those that have been approved by this user. Note in the info pane that “Action on Use” is Link (circled):
The new Entry shows that it is a Controlled Document (Type and Classification are displayed).
Right-click menu option:
1. In the Document Tree (left panel), right-click on the Notebook Page where you want to use a Controlled document.
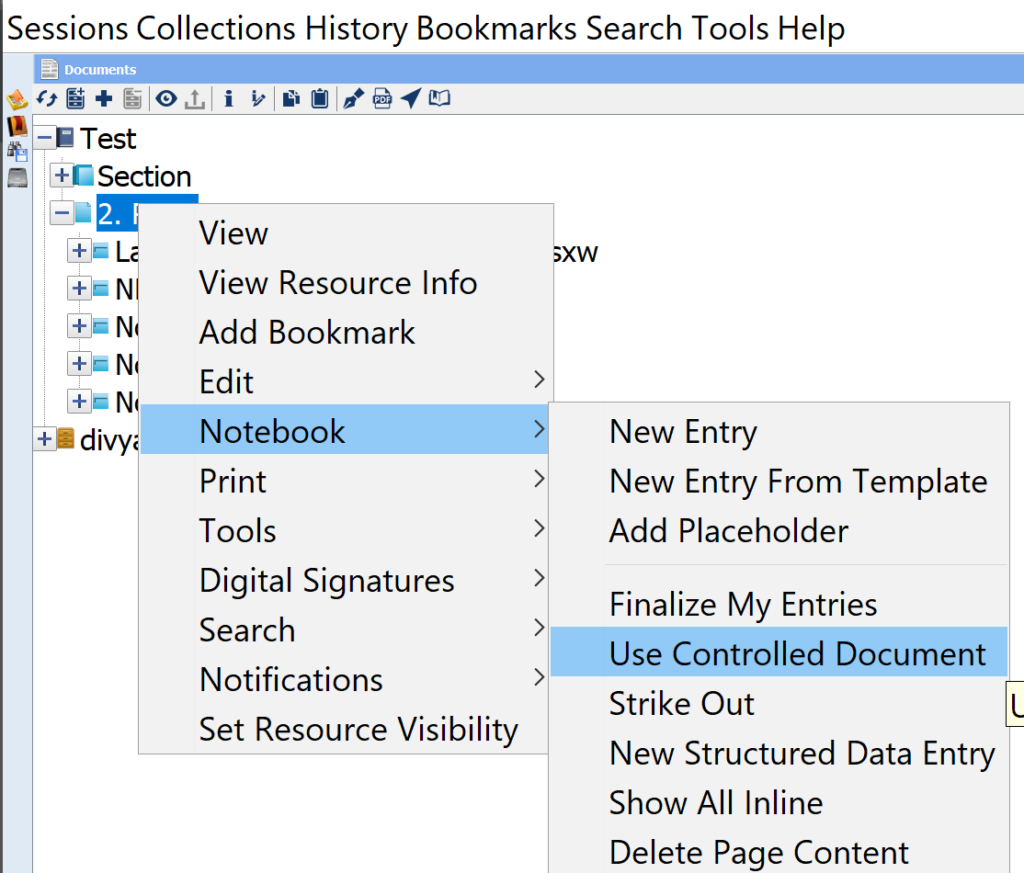
2. This launches a dialog that shows any Controlled Documents that you may use (because you have marked it as “Agreed”)
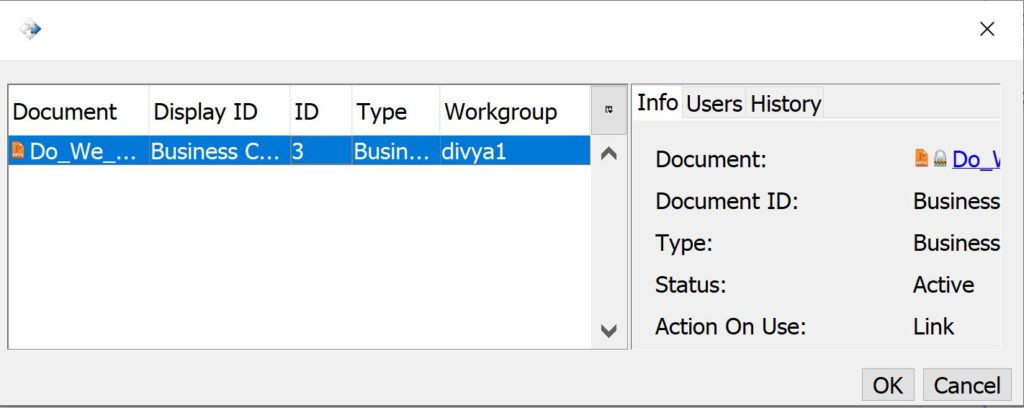
3. Select a Controlled document from the list and click OK to add it to the Notebook Page.
The Title of the Notebook Entry will show that this is a Controlled document (CD) and the type.
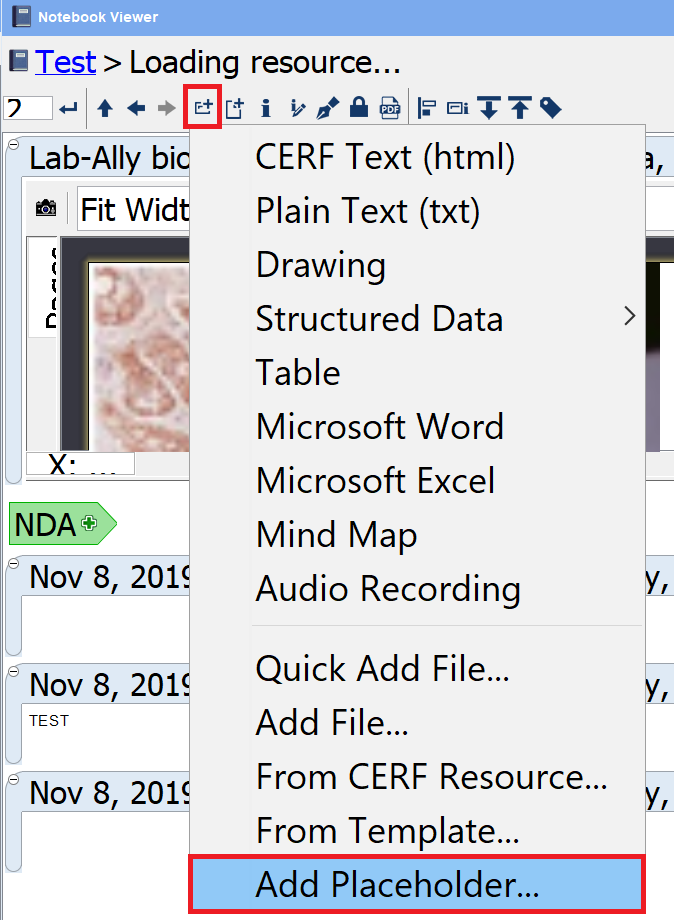
Create a Placeholder:
1. From the Notebook page, click on “New Entry” (marked below)

2. Choose “Add Placeholder…”
3. In the options, select the box for “Only allow Controlled Documents”
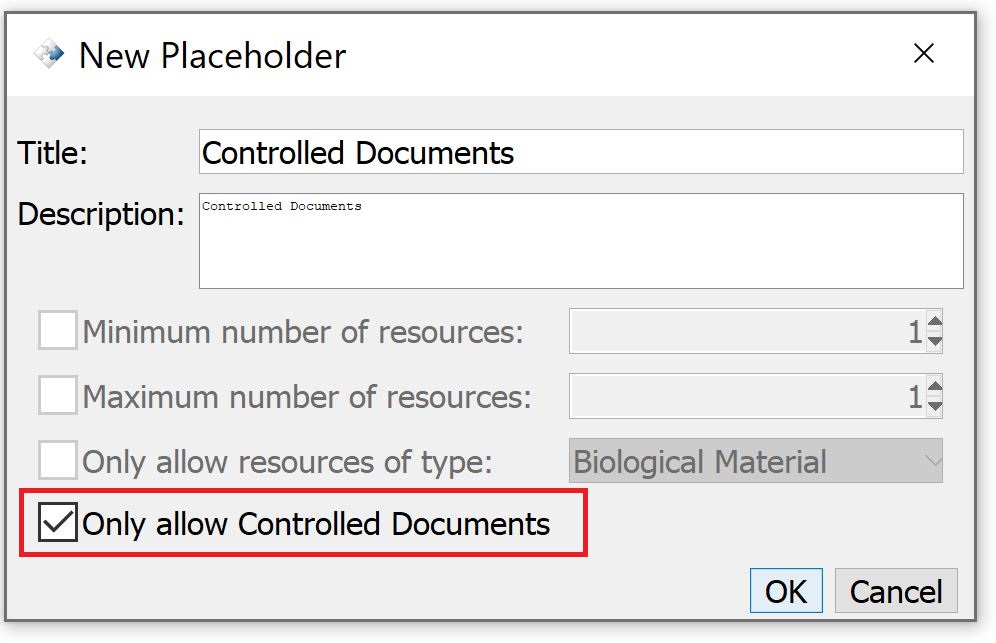
Note: you will need to provide a title and description for the placeholder
< Filtering up Updating >