A placeholder can be created on a Notebook Page to indicate the point of insertion for a file or files that are to be added at a later time. The placeholder can optionally specify the number of files (maximum and minimum) to be added and the Resource Type. A placeholder can also be used to indicate that a controlled document needs to be inserted. As an example, this can be used to force a user to select an approved protocol that has been assigned to them and that they are approved to use, and insert it into a notebook page placeholder as part of a specific workflow.
Create a Placeholder on a Notebook Page
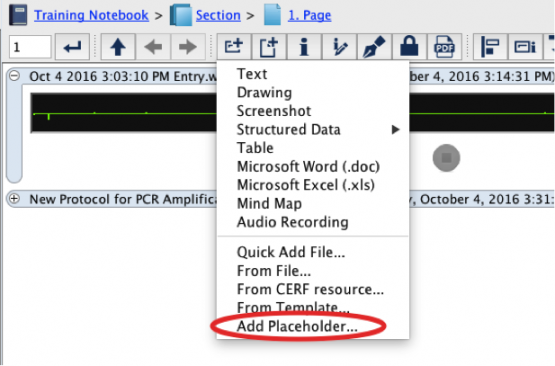
The easiest way to add a Placeholder is to click on the New Entry button and select Placeholder. (Or right-click on the Notebook Page (either in the Notebook Viewer or in the Document Tree) and select Notebook > Add Placeholder.
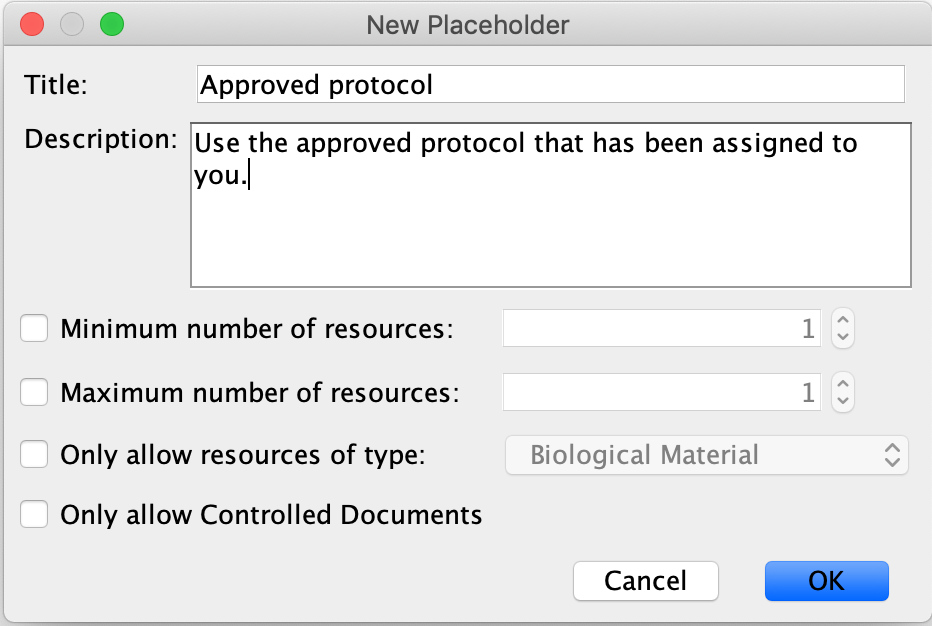
This launches the New Placeholder dialog. Type in a title for this placeholder, and a description. This example has no restrictions (number of files and type).
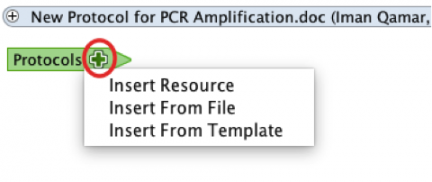
The empty placeholder will be displayed on the Notebook Page in the Notebook Viewer and in the Document Tree. One way to add a file to the Placeholder is to click on the plus + for a menu. The insert menu allows you to search for and select a resource that is already in CERF, to add a file that is on your computer (from File), or to add a file from a Template (shown below):
Or simply drag a file from your desktop or from the Document Tree and drop it directly on the Placeholder in the Notebook Viewer. As you hover over the Placeholder with the file, a message tells you where to drop it:

Now you will see the file you added below the Placeholder. It is a regular Notebook Entry. Click on the header to see the Entry Toolbar. You can add more files to this type of Placeholder, because it has no restrictions:
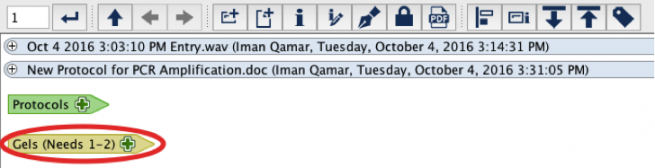
Placeholders with Restrictions
If you wish to set a requirement for the minimum/maximum number of resources to add to the placeholder, select the checkbox(es) and a number. Also if you wish to require a specific resource type, select the checkbox for resource type and select the resource type from the drop-down list.
- Note that CERF will only recognize a Resource Type for a resource that has already been submitted to CERF. If you drag a resource from your filesystem, CERF will just assume that it is the correct Resource Type (thus, it’s better to drag a resource from one of your File Cabinets or Notebooks).
- Note that CERF has a hierarchy of file types and selecting a more general type will allow more specific types to be added. For example: An Image is a specific type of Document, so that if you choose Document as the type then images can be added as well. Inversely, if you choose Image as the type, then general Document type resources cannot be added.
Click OK to create the placeholder on the page.
Add Files to the restricted Placeholder in the same way you add files to an unrestricted Placeholder. Note that you must add the specified file type if you set that restriction and you will not be able to add more files once the limit is reached. You may set your preferences (Tools > Options > Notebook tab) to show or hide Placeholders that are “full” (i.e., the limit for the number of files has been reached).
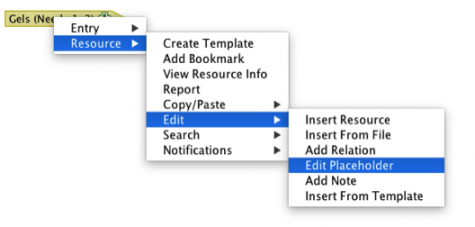
Note: you can edit a placeholder to change the required number or type of resources. Right-click on the placeholder in the Notebook Viewer and select Resource > Edit > Edit Placeholder.
In the Edit Placeholder dialog, use the up/down arrows to change the number for maximum/minimum cardinality or select the number and type the quantity desired.
Restrictions:
- A placeholder cannot be moved (cut/paste) in a flexible notebook. If you attempt to move a placeholder to a new location, CERF will launch an information message that the move failed and that placeholders cannot be moved.
- If you attempt to sign a page that has an unfulfilled placeholder, you will not be permitted to sign until the minimum number of entries are added.
< Mind-map up Placeholders (Controlled Documents) >