CERF 6.0 Documentation
Go to CERF 5.3 Documentation
Show the Document Tree (also called the CERF Tree) (if hidden) by clicking the Document icon ![]() to the left of the application (or use Ctrl-1)
to the left of the application (or use Ctrl-1)
Hide the Document Tree by clicking the “Close View” ![]() button in the upper-right corner of the Document Tree (or use Ctrl-1). If there are no other panes in the Left Panel, hiding the Document Tree will close the Left Panel.
button in the upper-right corner of the Document Tree (or use Ctrl-1). If there are no other panes in the Left Panel, hiding the Document Tree will close the Left Panel.
The Document Tree displays Resources (file of all types) that are stored on a network server. After you have submitted Resources to CERF, you can organize, view, edit, sign, and share Resources that are displayed in the Document Tree. When you select (i.e., click on) a Resource in the Document Tree, the right-click menu is configured to show only those actions that are appropriate for the selected Resource type and permitted by your access role.
The Document Tree is organized by Collections (File Cabinets, Notebooks, and Notebook Collections). You will be able to view only those Collections to which you have access.
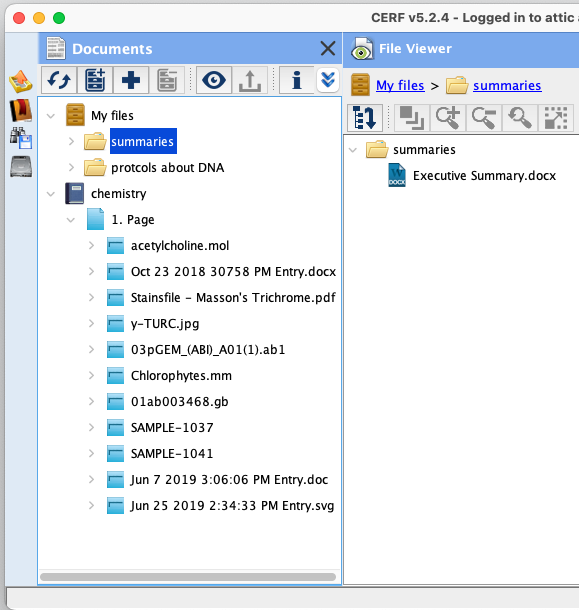
To expand and browse collections toggle the expand arrow next to the item. To expand an item and automatically expand and display all of its children in the center panel, select the item in the tree and click the view icon ![]() .
.
The first time you log on to CERF, your personal File Cabinet, identified with your username, is displayed in the Document Tree. You will be able to create other File Cabinets and Notebooks (if business policy permits users to create their own Notebooks).
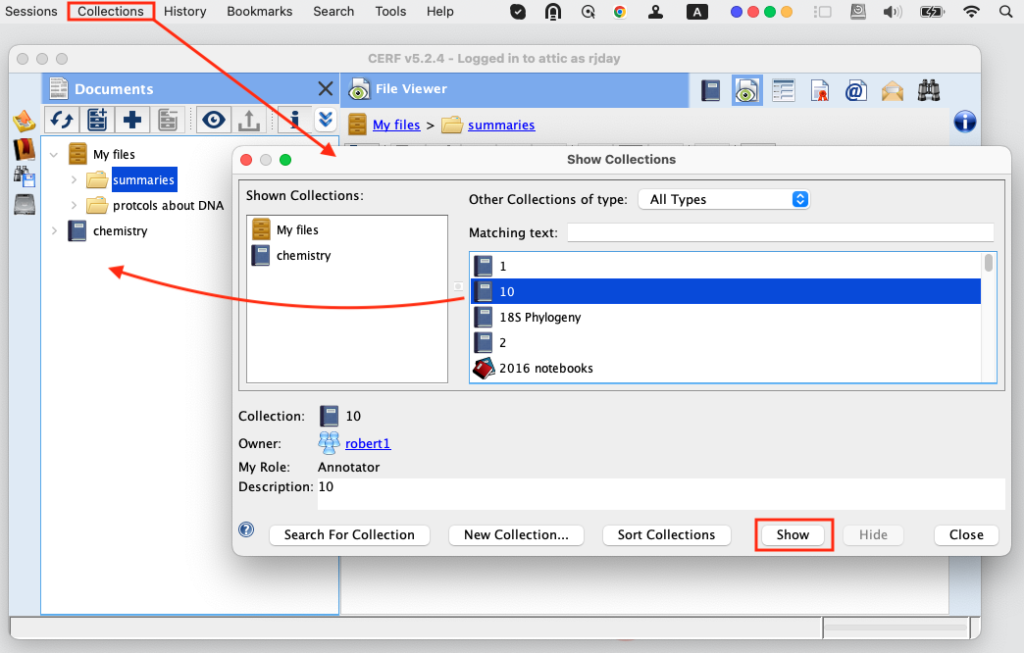
When you want to work on a specific Notebook or File Cabinet that you do not see in the tree, you first need to find it in the Show Collections dialog and then click Show to add it in the Documents Tree.
Right-click items in the tree (or almost anywhere in CERF) to see a rich, contextual list of actions you can perform on that item.
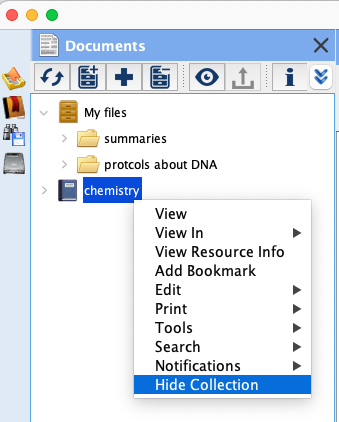
NOTE: Using the right-click menus with the items displayed in the CERF tree is a key skill that users of CERF should master. Try to become as familiar as you can with various options that CERF offers you in these menus.
NOTE: One of CERF’s strengths is that it automatically adjusts what you can or can’t do with resources based on compliance best practices and rules set by your CERF Administrator. The options available when you right click on items in CERF can vary considerably depending on many factors. These include:
- Workgroup owner and contributor
- Your access role
- The type of resource
- The Finalize and Digital Signature status of that resource
- The types, number and status of CERF collections that the resource appears in.
- Version history and versionability status
Signature workflow rules
If you don’t see the option you are expecting, in a drop-down menu (and / or if a corresponding icon in the interface is greyed-out), try using right click > View Resource Info to determine the workgroup that owns the resource, your access role and the current edit and signature status of the resource. If you still do not see what you are expecting…
- wait a moment to see if the server is updating a recently changed resource then try right-click again
- Log out and log in again. Some changes to things like user role only take effect after the user logs out.
- Contact your CERF Administrator or CERF support for guidance.
Sections in this Topic
< Left Panel up Document Tree Icons >